
Cpanel is a web hosting control panel that provides a graphical interface and automation tools designed to simplify the process of hosting a website. Cpanel is typically installed on a server that is already running the Apache web server software and can be accessed via a web browser.
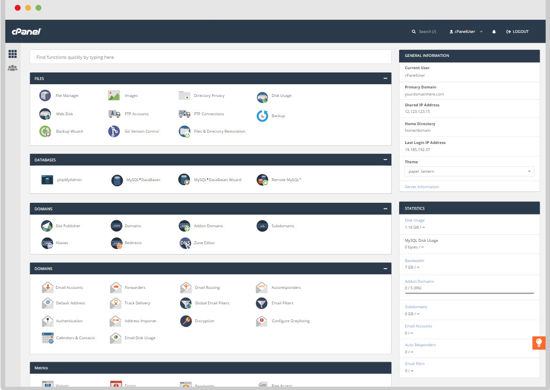
The Cpanel interface is divided into a number of sections, each of which provides access to different features and functions. The main sections are:
File Manager: This section provides a way to manage files on your web server. You can use the File Manager to upload, download, edit, and delete files, as well as create and extract archives.
Databases: This section allows you to create and manage databases on your web server. Cpanel supports both MySQL and MariaDB database servers.
Domains: This section allows you to add, remove, and configure domains on your web server. You can also set up subdomains and redirects from this section.
Email Accounts: This section allows you to create and manage email accounts for your domain. You can also set up email forwarding and autoresponders from this section.
Software: This section provides access to various software applications that can be installed on your web server. These applications include WordPress, Drupal, Joomla!, and Magento.
Security: This section provides tools to help you secure your web server. These tools include a firewall configuration tool, password protection, and SSL/TLS certificates.
Cpanel also provides a number of other features and functions, such as website statistics, cron jobs, backups, and more.
How to Install and Configure Nginx on Cpanel
Nginx is a web server that is gaining popularity for its high performance and low resource utilization. Although Nginx can be used as a standalone web server, it is often used as a reverse proxy in front of other web servers such as Apache. In this guide, we will show you how to install and configure Nginx on a cPanel server.
Before you begin, you will need to have the following:
A cPanel server with root access
A domain name pointed to your server
Step 1: Install Nginx
First, we need to install Nginx. We will be using yum to install Nginx from the EPEL repository.
To install the repository, run the following command:
yum install epel-release -y
Once the repository is installed, we can install Nginx by running the following command:
yum install nginx -y
Step 2: Configure Firewall
Next, we need to configure the firewall to allow traffic on port 80 (HTTP) and port 443 (HTTPS). To do this, we will use the firewall-cmd tool.
Run the following command to allow HTTP traffic:
firewall-cmd –permanent –add-service=http
Then, run the following command to allow HTTPS traffic:
firewall-cmd –permanent –add-service=https
How to Login to Your Cpanel Account
Assuming that you have already registered for a hosting account and have chosen cPanel as your control panel, the first step is to login to your cPanel account. You can do this by going to the following URL:
http://www.yourdomain.com/cpanel
Replace “yourdomain.com” with your actual domain name. Once you are at the cPanel login page, simply enter your username and password in the appropriate fields and click on the “Login” button.
If you can’t remember your cPanel login details, you will need to contact your web hosting provider and they will be able to assist you.
Once you have logged in, you will be taken to the cPanel home screen. From here, you can begin managing your website and all of its associated features.
How to Downgrade WordPress from Cpanel – a Step by Step Guide
Have you ever had to downgrade WordPress from cPanel? If so, you know it can be a bit tricky. In this article, we’ll show you how to do it in just a few steps.
First, you’ll need to login to your cPanel account. Once you’re logged in, scroll down to the “Softaculous Apps Installer” section and click on the WordPress icon.
Next, click on the “Settings” tab and then scroll down to the “Version” setting. Here, you’ll need to select the version of WordPress that you want to downgrade to.
Once you’ve selected the correct version, scroll down and click on the “Update” button. cPanel will now downgrade WordPress to the selected version.
That’s it! You’ve successfully downgraded WordPress from cPanel.
The Best Cpanel Hosting Providers
cPanel is one of the most popular and well-known web hosting control panels. If you’re looking for a web host that offers cPanel, then you’re in luck. There are a number of great cPanel hosts out there.
- Inmotion Hosting
Inmotion Hosting is a great option if you’re looking for a cPanel host. They offer a wide range of plans, including shared, VPS, and dedicated plans. They also have a 90-day money-back guarantee, so you can try them out with no risk.
- A2 Hosting
A2 Hosting is another excellent choice for a cPanel host. They offer a variety of plans, including shared, managed WordPress, VPS, and dedicated plans. They also have a Anytime Money Back Guarantee, so you can try them out with no risk.
- SiteGround
SiteGround is another great option for a cPanel host. They offer shared, cloud, reseller, and enterprise plans. They also have a 30-day money-back guarantee, so you can try them out with no risk.
- Bluehost
Bluehost is a great option for those looking for a cPanel host. They offer shared, WordPress, VPS, and dedicated plans. They also have a 30-day money-back guarantee, so you can try them out with no risk.
How to Log in to Your Godaddy Hosting Account and Access Cpanel
- First, you’ll need to log in to your GoDaddy account. If you don’t have a GoDaddy account, you can create one here.
- Once you’re logged in, click on the My Products tab.
- Find your hosting product and click on the Manage button.
- On the next page, scroll down to the Settings section and click on the Show More link.
- In the Advanced Settings section, you’ll see your cPanel login information.
- To log in to cPanel, you’ll need to use your domain name. So, if your domain name is example.com, you would enter example.com:2082 in your web browser’s address bar.
- You should now see the cPanel login screen. Enter your cPanel username and password and click on the Login button.
- Once you’re logged in, you’ll see the cPanel dashboard which gives you access to all of the features and tools that come with your hosting account.
How to Use Hostgator Cpanel
- First, you’ll need to log in to your HostGator cPanel account. If you don’t have an account yet, you can sign up for one here.
Once you’re logged in, look for the “Domains” section and click on the “Subdomains” icon.
- On the next page, you’ll see a list of your currently created subdomains. To create a new subdomain, simply enter the name you want in the “Create a New Subdomain” field and click on the “Create” button.
- Now that your subdomain has been created, you’ll need to choose which directory it points to. By default, it will point to the same directory as your main domain (e.g. public_html/subdomain), but you can change this if you want.
- Once you’ve selected the directory, scroll down and click on the “Create Subdomain” button.
And that’s it! Your subdomain should now be up and running and you can access it by going to http://yoursubdomain.yourdomain.com in your browser.
Setting Up Cpanel Webmail on Your Domain
Domain webmail is a great way to stay connected to your website while on the go. Cpanel webmail is one of the most popular domain webmail providers and setting it up on your domain is a breeze. In this article, we’ll walk you through the steps of setting up Cpanel webmail on your domain.
- Log in to your Cpanel account.
- Look for the “Email” section and click on the “Webmail” icon.
- On the next page, select the domain you want to set up webmail for from the drop-down menu.
- Enter your desired username and password for the new webmail account.
- Click on the “Create Account” button to complete the process.
That’s it! You have now successfully set up Cpanel webmail on your domain.
Is Your Cpanel Email Not Working? Here Are Some Possible Solutions!
If your cPanel email is not working, there are a few potential solutions. First, make sure that you are using the correct email address and password. If you have forgotten your password, you can reset it by following the instructions in the cPanel documentation.
If you are still having trouble, it is possible that your email account has been suspended or deleted. To check, log in to your cPanel account and go to the Email Accounts section. If your account is listed as “Suspended” or “Deleted,” you will need to contact your hosting provider to have it unsuspended or restored.
It is also possible that there is an issue with the mail server itself. If you are using a shared hosting plan, you can contact your hosting provider’s support team to investigate the issue. If you are using a private or dedicated server, you will need to contact your server administrator for assistance.
Finally, if none of the above solutions work, it is possible that your email client is not configured correctly. Check the settings in your email client and make sure that they match the settings in your cPanel account. For more information on configuring your email client, please see the cPanel documentation.